Search This Blog

Showing posts with label home cooking. Show all posts

Friday, September 26, 2014

Button Mushrooms

Growing up, I hated mushrooms. They were kind of slimy, earthy, and smelled of gym socks. How could anyone possibly like these things on anything? As far as I was concerned, the entire fungi industry was a conspiracy created by a bunch of whack-jobs.

Fast forward a few hundred years and I love mushrooms! They can be delicate, yet savory and crispy at the same time. You can make something as simple as a mushroom risotto and utilize the entire mushroom to the fullest. Now, since going through various fine dining restaurants and culinary school, I’ve developed a few methods for cooking them.

There are a few things you need to understand first:

Mushrooms are a fungus. Therefore they grow off of a food source, as opposed to using chlorophyll to absorb the sunlight. The mushrooms you buy in the grocery store are grown in a decaying matter and you don’t want that flavor competing with your delicate beauties. Rinse them off! I know it sounds weird, but trust me, it makes a huge difference. Let them dry out on a towel on the counter or baking sheet before executing a cooking process.

High water content. Clocking it at over 90% water, the mushroom has a lot of flavor to concentrate into one little morsel. The point of this cooking process is to extract the moisture in the most efficient manner. The ingredients I chose to use really accentuate the mushroom and allow it to conform easily to another dish or standalone by itself.

Super absorbent of flavors. As moisture escapes, it leaves a void to be filled by flavor. By filling it with fat (which is less dense than water) you are able to allow more flavor to be absorbed into the mushroom. You can mess around with different ingredients until you find what best suits your taste buds, but I find this to be an all-around winner.

Remove the stems. I’ve found that some places will keep mushrooms on the shelves for a really long time and still sell them, and then they continue to sit in the fridge for another week or so. You can’t really tell when a stem is going to end up tasting woody, and that completely ruins a mushroom more than a mushy one. So just throw it into the compost pile or stock pot.

Today I’m sharing what I feel is a fool-proof way of making those basic button mushrooms and the most delicious addition to any dish. I use them in omelets, frittatas, pizza, Stromboli, and casseroles. These also make a great addition to any stir-fry or sauté dish.

BONUS: combine with caramelized cauliflower for a meat substitute in tacos or quesadillas. It tastes and feels just like steak!

Prep time: 10 minutes
Cook time: 20 minutes

Ingredients:
2 packs button mushrooms (about 2 lbs) rinsed and stemmed
30 sprigs of fresh thyme (lemon thyme preferred) or sage
Salt (smoke sea salt preferred)
Pepper (fresh ground)
½ stick butter or ½ cup garlic infused oil

Directions:
  1. Cut mushroom caps into 6ths. Start with a half, and then make two cuts in the center of one half (making a “V”). The idea here is to make all the cuts roughly the same size so they cook evenly.
  2. Put a cast iron or heavy gauged pan over a medium heat. Once the pan is hot, place a 2 Tablespoons of butter in the pan and allow to melt.
  3. Toss the mushrooms into the hot pan. Make sure that mushrooms have about ½” of space between all of them. You may need to do a few batches to complete the whole task.
  4. Throw in about 10 sprigs of thyme. Season with salt and pepper. Feel free to go a little more liberal on the salt than you usually do, it aides in extracting moisture from the mushrooms.
  5. Move mushrooms around occasionally until all sides are dark brown, but not burnt.
  6. Add more butter if you notice that the browning process is slowing down after 5 minutes or so.
  7. The result will look like this once it's cooled.


Tuesday, January 21, 2014

Garlic Confit

I recently had the opportunity to clean out my pantry and, much to my surprise, I ran into some old garlic that was going bad. Now, I hate to throw things out, so I decided to preserve them further.

In restaurant’s we have many processes that we use to both save and utilize multiple applications of the same product. The most obvious for me in this situation was to confit it.

The process of confit means to preserve in oil, or it’s on fat (when pertaining to animals). This will extend the shelf life up to a month, even if you’re working with old garlic.

If you are facing the same issue I was, simply cut the bad garlic out of the bulb when you remove the skin. Trim down any brown pieces off any cloves so the flavor won’t transfer into the oil.

This cooking process will yield you two products: garlic infused oil and slow-cooked garlic. Both of these products are really great to utilize in the kitchen. The cooking process mellows out the garlic flavor and makes it very rich and savory – not pungent at all.

I would use the oil in salad dressings and as a base in soups. My favorite thing to do is sauté my veggies in it before I add it to rice or pasta. You can also drizzle this on some bread and roast, sear, or press it to make garlic bread. Make it super garlicy and spread some of the confit garlic on there as well for good measure.

The actual remanding cloves of garlic will be light brown, a slightly roasted color. You can use this as a thickener and flavoring agent in spreads, sauces, and soups.

Fold the garlic in with some cream cheese or mascarpone cheese with onions, shallot, citrus, and herb; and you have a fantastic stuffing for a chicken or ravioli.

You can also blend this up with some marinated artichokes, sautéed spinach, and garlic oil to make a simple chip dip. Extra points if you add some chive, tarragon, and crab!


Prep time: 10-20 minutes (depending on amount)
Cook time: 20-30 minutes

Ingredients:
Garlic cloves
Fat (olive oil, grape seed oil, coconut oil, blended oil, or avocado seed oil)

Directions:
  1. Trim the rough ends off the garlic; as well as any brown or green parts.
  2. Place trimmed garlic into a sauce pot.
  3. Pour enough fat into the saucepan to cover the garlic by at least a quarter inch.
  4. Place pot on the fire and bring up to a simmer.
  5. Allow to simmer until garlic is tender and slightly brown.
  6. Remove from heat and allow to cool
  7. Strain garlic from oil by pouring into a colander or fine mesh strainer. Make sure you have a container below the strainer to capture the oil.
  8. Store oil and garlic separate in refrigeration. 

Tuesday, October 22, 2013

Apple-maple Granola aka “The Crunch Attack”

I’m nicknaming this granola “Crunch attack” because it is the crunchiest, most gnarliest granola EVER! It’s super easy to make and packed full of nutrients and protein.

I chose to us a wide variety of seeds and nuts based on their nutritional value; however you can substitute with your favorite variety as well. You can also substitute the dried fruit for whatever dried fruit you want. 

Just keep in mind that it comes down to a ratio of fat/sugar to the remaining product. I would suggest that no matter what you try and move around, that you keep the quinoa in it as it is one of the main crunch components.

As far as chopped nuts go, I did a pretty rough chop. The idea is that most of the large items besides the main garnish (apple) are the same size. This will allow for an easier cluster formation. You can also cheat and throw the nuts/seeds you want to use in a blender or food processer and buzz it up a few times (way faster and cleaner than doing it with a knife on the board).

Please enjoy with yogurt and apple butter/apple sauce. Store in a cool, dry place.


Ingredients:
2 cups oats
½ cup quinoa
¼ cup peanuts (chopped)
¼ cup almonds (chopped)
¼ cup pepitas (pumpkin seeds)
¼ cup soy nuts (chopped)
2 Tablespoons flax seed
3 Tablespoons hemp seeds
1 cup apples (dehydrated)
½ cup cranberries (dehydrated)
1/3 cup coconut oil
2 Tablespoons apple butter
2/3 cup maple syrup  or honey
Pinch dark chili powder
Pinch pink Himalayan salt

Directions:
  1. Heat coconut oil, apple butter, and maple syrup in small sauce pot until coconut oil is melted.
  2. Take remaining ingredients and combine in a large mixing bowl.
  3. Add liquid and mix until incorporated.
  4. Place the mixture on a sheet  tray line with parchment paper or foil.
  5. Bake in the oven at 225 for 2 hours.


Wednesday, October 16, 2013

Curried Apple Jasmine Rice

Continuing on with my apple extravaganza, I decided to make a curry spice soup and add jasmine rice to it. 
However, I used too much rice, or too little liquid (depending on what side of the line you’re on) and it really turned out to be more of a rice dish than a soup. Anyway, my loss is your gain because I turned it into this savory dish with a sweet note guaranteed to accent any protein quite nicely.

This dish is not particularly spicy, however, it does have some spices in it to heighten the flavor and allow the sweetness to cut through it. Combined with the fragrance of jasmine rice, this dish is a total plunder of your senses.

I would say that if you want this to be more of a soup that you cut the portion of rice down to 2/3 cup or double the recipe and maintain the same amount of rice. You can even throw some chicken/beans in there as well if you want to make a complete meal out of it.

Keep in mind that this recipe will be blended, so uniform cuts won’t really matter here. You are just looking to make it as easy as possible to break down the vegetables.

I highly suggest enjoying this rice with my veganchili  on top. Take it a step further and a piece of grilled meat, or two fried eggs with a healthy sprinkle of a mild cheese on top. Maybe even shaved fennel salad?

Anyway, enough jibber-jabber, TO THE INGREDIENT LIST!

Curried Apple Jasmine Rice


Ingredients:
1 green chili (chopped)
1 carrot (chopped)
2 medium onions (chopped)
2 cloves garlic (sliced)
1 dried chili (chopped)
2 apples (grated)
2 Tablespoons olive oil
3 ½ tsp curry
1 cup milk (whole)
4 cups stock (vegetable or chicken)
1 ½ cup jasmine rice
Zest and juice 1 lime
¼ cup cilantro or parsley (chiffonade)
Season to taste

Directions:
  1. Put a medium pot on the fire on medium-low
  2. Once pot is hot, pour in your oil 
  3. Add chili, carrot, onion, garlic, pickled pepper, and dried chili. Continue cooking until onions are translucent. 
  4. Add curry spice and allow to dissolve in remaining liquid for a few minutes, then add your apples.  
  5. Allow to cook more until apples become tender and start to fall apart. 
  6. Pour in your milk and stock and allow to come to a simmer. 
  7. Using a blender or immersion blender, puree contents until smooth. 
  8. Add Jasmine rice and continue to cook until rice is tender. 
  9. Finish with lime juice and herb and incorporate into the rice. 


Tuesday, October 15, 2013

Crock-pot Apple Butter

This past week I went apple picking and got a little too excited with the festivities and went a little overboard. Needless to say 28lbs of apples later I basically had to approach it on a colonial scale. So, I wound up doing around 7 different ways and this is probably one of the best, without a doubt. I’d even go as far as to say that this is one of the best recipes I’ve released thus far!

I chose to use the crock-pot method as a way to start exploring the possibilities with these great little guys. I know a lot of you out there probably have one lying around and I want to encourage you to get full use out of any equipment you have. This particular recipe takes about 12 hours to complete, so feel free to just pile in some ingredients and let it go while you continue with your day.

As far as uses are concerned, I would say that you should treat this as a sauce substitute (add a little cold butter to the warm apple mixture, maybe a little rosemary – call it a day), or simply as a sweetener in recipes (think adding to yogurt, toast, bagel, vinaigrette's, marinades, stuffing, or soup).

Keep in mind that apples have a very high moisture content and add a lot of moisture to any recipe when baking. It also contains a lot of pectin (natural plant-based thickener) in the core, so by adding that to a jelly/jam you can sweeten and thicken in the same step.

Crock-pot apple butter


Ingredients:
6-8 apples quartered with the seeds cut/scooped out (enough to reach the indent on the pot)
2 tsp cinnamon (ground)
½ tsp nutmeg
1 clove
1 Tablespoon(ish) pickled ginger (I like a good zip of ginger)
1/8 cup honey (a floral variety like rosemary/lavender works well here)
1 shot whiskey (I suggest the Irish variety)
1 cup water
3 Tablespoons apple cider vinegar 

Directions:

  1. Combine all ingredients into crock pot and cover for about 6-8 hours. 
  2. Once it reaches the point where it looks like the picture below, leave uncovered and cook for another 4 hours, stirring occasionally. 
  3. Once it reaches this color, puree it up in a blender. It should be about this dark when compared to regular apple sauce. 
  4. Enjoy! 

Monday, August 26, 2013

Sweet-Pickled Jalapenos

One of my favorite flavor combinations is sweet and hot; so what better thing to do than sweet-pickle some hot peppers? I chose to use Jalapeno peppers here because I know a lot of people grow them and around this time they are super abundant.

If you’re into jarring/canning things, this is something I would suggest highly. They also make great gifts when transferred to mason jars. Keep in mind though that the shelf life probably won’t be more than a few months – if that.

I haven’t really experimenting into how long these pickles last before they spoil. I can tell you from the restaurant industry that refrigerated pickled vegetables can last up to four or five months if kept properly. The key is to keep the pickled whatever under the liquid so it doesn’t get a chance to grow mold on it.

One industry tip for doing this is putting a plate on top of the product to keep it submerged. However, the normal person doesn’t have a large enough container for something like that. So, fill a plastic Ziploc bag with dried beans or salt to create a weight. Important: remove as much air from the bag as possible by submerging it in water while holding the top of the bag. Once you get as much air out of there as possible, seal the bag. Do this once more, creating a double bag (so you can use it again). This creates the closest you’re going to get to a vacuum seal without a vacuum sealer. Anyway, place the bag on top of your pickled veg so the product is forced down and cover the container your pickle is in with the appropriate lid.

That being said, pickling peppers does take some of the heat out of them, so they aren’t as spicy as when they are raw. If you want to remove even more heat (like if you were pickling a habanero), remove the pith and seeds before you pickle it. This will result in the full pepper taste, but dial the heat down quite a bit. You can also add more sweetness to the liquid, or add fruit into your combination.

Sweet-pickled jalapenos


Ingredients:

8 Jalapenos (sliced)
3 cups apple cider vinegar
4 Tablespoons pickling spice
2 Tablespoons salt
4 Tablespoons sugar
2 teaspoons honey
Sauce pot (medium sized)
Mandolin or knife
Container large enough to hold four cups (a quart)

Directions: 
  1. Sanitize your peppers 
  2. In a sauce pot over medium heat, slowly toast the pickling spice until you begin to smell it (you may hear some popping too)
  3. Add your vinegar, salt, sugar, and honey; and bring to a boil
  4. While you are waiting on this, slice down your peppers and place into container
  5. Once boiled, either strain the spice mixture out or leave it in
  6. Pour into container with peppers
  7. Let sit uncovered until it begins to cool down a bit
  8. Place your weighted bag on top of the peppers and make sure they are submerged fully
  9. Cover the container and store in the refrigerator for 48 hours before transferring 


Thursday, August 22, 2013

Tomato and Herb Sauce: How-to

Anyone up to their ears in tomatoes? Well, first off – share some with me! Secondly, don’t let those delicious fruits get the best of you and wind up rotting away. These gorgeous colorful gobfuls of flavor are just waiting for you to use them.

One of the easiest and tastiest ways to preserve a tomato is with a sauce. Now, see, I don’t really like tomatoes all that much unless something is done to them. It’s embarrassing, but such is life. So, I’m always taking them and morphing the tomato into something spectacular.

This recipe explores a tomato and herb sauce. It’s pretty basic and comes straight from the garden (or farmers stand) so it’s not very labor intensive at all.
In the culinary industry, we are taught to concasse the tomato to make a sauce. This involves taking the stem out, making a few incisions, blanching them, cooling them, peeling them. I think it’s silly and it takes too long. 

However, my process still has the same principles in mind. Luckily there is more than one way to get things done in the kitchen!


Before I get into the recipe with you, I would like to bring up a few variations on the sauce:
1.       Romesco – add some peppers to the roasting process (seeded of course). Finish with lemon, basil, and oregano.
2.       Make the sauce more red – before transferring ingredients to pot, put about ½ tsp of tomato paste in the hot pot and stir until it starts to brown up and caramelize. This will make the sauce a little heavier in flavor and you may have to offset it with a little acid (white balsamic, lemon, champagne vinegar)
3.       “Fire roasted” style – keep the tomatoes in the oven longer until the skin starts to roast and gets black in some areas. Don’t peel the skin off! Simply add to the pot and puree it up after it reduces. This is also another way to add additional color to the sauce.
4.       Tomato soup – simply add carrot, celery, and onion to a hot pot on medium heat. Stir and cook until onions are translucent. Add 2-3 tablespoons of oil/butter and allow to melt/heat up. Sprinkle in some flour (enough to coat the vegetables) then add a large amount of tomato sauce (I figure 1 quart of sauce per 2 cups of additional veggies) slowly, while stirring. Cook that down for about two hours, blend and enjoy!
5.       Colored sauce – with the ever popular heirloom tomatoes, the color variation is superb. Follow the same recipe, but use yellow, brown, or purple tomatoes. I would suggest blanching tomatoes if they are green though – it preserves the color better.

So, as you can see by taking this very simple sauce, you can go much further. The best thing I’ve found to do is to do batches in different styles, then portion them off into pint containers /freezer bags and then freeze it for a later use. There’s nothing like having an amazing go-to tomato sauce right at your fingertips in the dead of winter.

Enough jibber-jabber; on to the recipe!

Tomato and Herb Sauce 

Ingredients:
10 ripe tomatoes (the big guys are usually the ones used here)
1 sweet onion (large dice)
2 cloves garlic
Olive oil
2 stems worth of basil leaves (or as much as you like)
3 stems worth of thyme leaves
(optional) “makes everything awesome spice” to taste
Mixing bowl
Oven
Large/medium pot
Stirring spoon
Sheet tray/cookie sheet
Blender
Strainer (optional)

Directions:
1.       Take all ingredients, except herbs, and toss in olive oil, salt and pepper.
2.       Place in oven at 400°F on a sheet tray.
3.       Once cracks in the skin form on all the tomatoes, pull them out and shut off the oven.
4.       When tomatoes cool, peel off the skins and toss them out
5.       In a pot on medium heat, place all contents of the sheet tray
6.       Once the tomato concoction comes to a light boil, turn heat down low and cover the pot
7.       Stir occasionally every fifteen minutes or so.
8.       After an hour and a half you should have been able to cook down the tomatoes pretty well.
9.       Blend contents in a blender, or use a little stick blender right in the pot if you have one.
10.   Transfer back to the pot
11.   Leave  the pot uncovered and add your herbs.
12.   Cook down for at least another half hour, or until color desire has been achieved, or you are satisfied with the flavor.

13.   Season to taste with salt and pepper or “makeseverything awesome spice”

Friday, August 16, 2013

Rotini and Kale Salad

Given my last post on pasta, I thought it only appropriate to make some kind of pasta dish. 

However, I ate it! 

So, I did what any good cook does and utilized a ton of leftover product; and made this delicious concoction I am dubbing “Pasta Salad with Kale.” I try and sneak in and experiment with dark leafy greens in dishes as much as possible.

This application makes a marinade/dressing for the pasta and really works well with kale to provide a great texture differential. You also get some of the bitterness from the kale which contrasts nicely with the other ingredients.

On a side note, I realize there were other ingredients in my pasta salad that aren't displayed in this picture and will make a better effort next time I do a pasta salad or something to have them in the picture. It really doesn't help when you do a photo shoot and you’re hungry…

Anyway, this is a great way to utilize pasta from the previous day and kind of clean out the fridge of random stuff. Please don’t feel limited to this ingredient list at all. Pasta salads are super unique in that they can be an entire grab-and-go meal depending on what you put in it. So, for instance you could increase the veggies and add a protein. I tend to view my unlisted ingredients as flavor builders and not as main stars of the dish – in this case it’s pasta and kale.

It is also super easy to just use (lemon vin) or any style dressing you have chilling out in the fridge. 

I used rotini pasta , but the goal is really to have something that is medium in size and in a shape that is more willing to include the other ingredients with it. Curled pasta works best here, don’t use string-style pastas or delicate pastas such as those wheel shaped ones (they break apart and don’t look good).


Ingredients:

1 lb pasta
1 tomato diced small
1 red pepper diced small
1 suntan pepper diced small
1 medium red onion (julienne)
2 cups (packed) red leaf or Tuscan kale (ripped or cut small)
¼ cup olive oil
Zest and juice 1 lemon
Sprig fresh dill chopped
Sprig fresh basil sliced thin
Salt
Pepper

Directions:
1.       Cook your pasta (learn the proper way here) or pull it out of the fridge
2.       While you’re cooking up your pasta, cut your veggies and remaining ingredients set aside.
3.       Combine ingredients with cooled pasta in mixing bowl or in original pot pasta was cooked in
4.       Season to taste
5.       Let sit/cool for at least an hour and a half before service

6.       Serve cold or room temp

Wednesday, August 7, 2013

Cooking Pasta: The truth about salting water and using oil.

Does anyone salt their pasta water and then put oil on top?

I’ve been working in restaurants for almost seven years now and the idea behind these two items has been expressed very insistently that this is the best way to do it. “Adding salt to the water makes it boil faster and the oil lightly coats the pasta when it’s done cooking so it doesn’t stick together.” When I heard this, I was curious if this was actually true so I decided to do some research, combine it with my (probably millions of pounds of pasta) experience, and provide you with the information.

So, let’s address this oil in the boiling water issue first. I’m sure we’ve all had times where you cook pasta and it sticks together in one huge clump. It’s horrible and disappointing to say the least (imagine having a chef chew you out for those clumps!) I haven’t found that putting oil on the top really helps on a small scale – which I’m sure most of you are only feeding a few people on average. You can also toss the pasta in oil after you transfer it out of the water so it doesn’t stick.

The real secret to cooking pasta that doesn’t clump at home is having your sauce hot and ready to go. I would suggest having it on the stove at a light simmer next to your pot of boiling pasta. Here is where you may need to go and invest in a strainer with a handle (called a spider in culinary terms). Once your pasta is done cooking, pull it out with the strainer and give it a shake to let it drain. Then, put it straight in the sauce, cover the pot/pan and let simmer for a few minutes and then serve. No need to empty the whole thing out in a colander over the sink and then bring it back to the stove. In the time it takes the pasta to drain, it won’t clump. Plus allowing the pasta to cook further in the sauce allows it to absorb the flavor of the sauce therefore making those glutenous little gobbles burst with flavor.

Right, on to salting the water! Let me make something clear straight off the bat: adding salt to water increases its boiling point. This means water will be boiling above 212° F and therefore take longer to reach that temperature. Anyway… when salted, you will have a higher cooking temperature and therefore theoretically cook it faster. However, in reality, you would need roughly ½ a pound of salt (that’s right, half a pound!) per quarter gallon of water, just to raise the temperature 3.6° F. So, I think it’s safe to say that salting the water really isn’t going to benefit you as far as the boiling point and cooking time are concerned.

This means the flavor is the remaining issue to address. Chefs in the industry describe the water you use to cook pasta as “salty as the sea” and the idea is that the salted water solution will absorb into the pasta and therefore give it more “flavor.” I’m a bit of a salty skeptic (pun intended), and have always disagreed with this concept. Yes, it will taste better if you add salt to it. I think it’s unnecessary if you already have a flavorful sauce and furthermore if you are cooking the pasta in the sauce for a few moments.


But why increase your sodium intake when you don’t have to? Every single ingredient does not need to be seasoned if you are seasoning the entire dish. I don’t see the point really, it’s rather redundant. 

Tuesday, July 16, 2013

How-to emulsify a vinaigrette (Lemon vinaigrette)

While browsing through the aisles in my local grocery store, I always try to be observant to who is buying what and what is available. One of the largest shelf spaces are devoted to salad dressings alone, its main rivals seems to be the canned aisle, or pre-made frozen meals. In any case, after reading a few labels, I realized there are a ton of options to go through: original, low-fat, reduced-fat, non-fat, fat-free – the list goes on. I did however read a few labels and was kind of thrown off by the fact that I didn’t know a lot of the ingredients that were used in these products, specifically in emulsified dressings.

So I’ve decided that for my next “how-to” installment that I should explore how to create your very own vinaigrette. The key here is to slowly add oil to your mixture so that you are able to create an emulsification.

However, I should point out that different oils emulsify better than others. The one the works the best is blended vegetable oil or canola oil. But, I would suggest using some other kind of oil such as olive or avocado seed since the blends and canola tend to be full of GMO’s and you really don’t know what weird blend is actually in there. Stick to the pure stuff.

I should mention that this needs to be done in a blender, and the emulsification is less likely to hold if you do it by hand. Don’t get me wrong, it will still be a great vinaigrette, but it won’t hold the emulsification as well as it could.

Use this recipe as a marinade for chicken/fish/veggies. This also works really well with potato salads (great alternative to mayo based), and marinated vegetables or cheeses. I would even dare you to spread a little bit on your next burger bun or sandwich and sear it in a pan real quick. Whatever you do with it, you can have the peace of mind that it’s healthy.

If you want to make this into a Dijonaise style dressing, use 2-3 Tablespoons of mustard to make it more mustard based.

If you want to make this into an Italian dressing, add some more garlic (however garlicy you like it), roasted red pepper (1/2 a pepper), and basil (a few sprigs).

Make it “creamy” by adding either an aole, mayo, or grated parm cheese (about 1/8 cup).  

Anyway, let’s do this!


Lemon vinaigrette (emulsified)

Ingredients:

Juice and zest of 2 lemons
2 sprigs of thyme (stems removed)
2 sprigs of oregano (stems removed)
1 clove garlic (roasted if you have it)
1/8 medium red onion (white works too)
2 tsp mustard (Dijon or honey-Dijon works best)
Salt and pepper to taste (I used about ½ tsp salt and ¼ tsp black pepper)
1/4 cup apple cider/champagne/white balsamic vinegar
Olive/avocado seed oil

Directions:

  1. Combine all ingredients in a blender and blend until incorporated
  2. Put the blender at a medium speed and slowly begin to pour your oil into the center of the whirlpool 
  3. It should start thickening up like this
  4. Your dressing is complete when the hole in the liquid disappears completely as depicted in the picture below. 


Monday, July 8, 2013

12 Kitchen items that will make your dishes extra sexy!


I've come to the realization, as of late, that I go to someones house and they are like "Oh! your'e a chef, you can cook anything!" I usually shrug my shoulders and say "Yeah dude." Then somehow we start cooking or coming up with something, because I love cooking with people and I love sharing information on a personable level. However, I've found the average kitchen to be quite lacking in tools to help you create restaurant (or just better) quality dishes.

So, I've compiled a list of 12 items that we (chef's) have in the kitchen that help us reach the goal we desire. Here they are in no particular order:
Mandolin:

This item is probably one of my favorite things to utilize. As you can see, this model comes with a few attachments that allow you to not only make thin cuts, but also a julienne cut, and a ripple cut - which are way cool! Furthermore, I would like to draw your attention to the black item that is sitting on top of the mandolin. This is a guard/guide and basically spears the product while protecting your hand against the blade. SAFETY is the key here!! I could probably bore you to death with the amount of stories I have of people taking the tips of their fingers off on these guys. USE THE SAFETY MEASURES!

There are cheaper plastic models that offer the same peace of mind. I'm not terribly partial on either model though. The plastic ones last a few years, but the metal ones can last a lot longer. If you are going to get a metal one, get one where you can remove the blade and either sharpen it or replace it. A lot of the metal ones can get dull and therefore create a bigger issue than previously had. 

A knife sharpener:

I'ts very important to keep your blade sharp. You may think a sharp knife is more likely to cut you - that's not true whatsoever. The sharper the knife, the easier it cuts; therefore requiring less effort from you. A lot of times when you have a dull knife, you have to hack away at something in order to cut it and that can be both messy and dangerous. This is an easy way to avoid all those situations. 

Mesh strainer:

I use strainers all the time, and have a few of them. For general use, I would say get a larger one (somewhere in the 9"-12" diameter range). I would say that it is very important that you also have a container that this strainer fits on top of so you can strain properly into it, instead of all over the counter and floor. I wouldn't really suggest that you invest in a fine mesh strainer. I'd say the one in the picture below is a medium, and it works for pretty much everything I need. I strain a lot of stuff out of broths, purees, gravys (get those lumps out!),  and for when I make cheese/whey protein. These items are pretty cheap (I think I picked up a set of three for under $10), and really allow you to take it up a notch!From www.nfsequip.com

Food processor:

This can quickly become your best friend in the whole world! A food processor is different from a blender because, if you notice all the attachments below, you have a ton more options to do with it. This comes in handy when you are breaking down large batches of produce or cheeses. This is also great when you have to mince or fine chop a bunch of ingredients. I've also pulled off making small dough batches, as well as your own mayo (aole if you want to be trendy). The slicing and grating attachment are great as well for blowing through fruits or vegetables to use for pies and the grater is amazing with cheese. 
Blender:

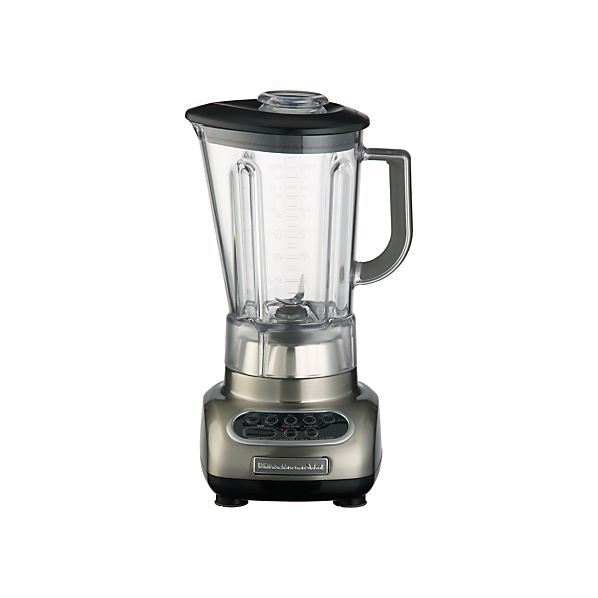
I use blenders all the time and I would say its more essential than a food processor. However, you can mostly just blend product, and there aren't any fancy attachments. The more powerful the blender the better! This is a great addition for pureed soups, sauces, smoothies, shakes, even cold oil or vinegar infusions. I prefer this to a stick blender because it usually creates a finer, smoother product than anything else I've worked with. 
Thermometer:

This is your number one friend in the kitchen! If you choose to get anything from this publication, get this and nothing else! One of the biggest issues I've seen is that people tend to overcook proteins, or their oil is not hot enough (or too hot) when they are frying something. So, I suggest you pick up a thermometer of the digital variety. I only say this because most of the analog thermometers require you to submerge the probe a good inch or so into the product. A digital one only requires that the tip of the probe be exposed to the temperature area thus resulting in a more accurate read. Make sure that your thermometer goes above 350 degrees though. You want to be able to make sure that if you go above it, you know before your oil catches flame. 
Zester/grater:

These little tools are one of my favorite things to use in the kitchen. This allows you to utilize the zest of citrus fruits, as well as creating a fine grate of cheese, nut, or ginger. It's really versatile in the uses, and you can simply throw it in the dishwasher when you need to wash it. I don't think mine ever makes it in the drawer haha. I would recommend the Microplane brand when it comes to this - it's totally worth the price. They have a lot of varieties, but this one and the wider model are the ones I would suggest.  Fresh grated anything tastes a whole lot better than anything you could find in a jar or in the dried version. 
Citrus Juicer:

These usually run around $3-$5 each. I totally suggest getting one of these to really utilize the freshness of citrus juice. I'm not a fan of buying these juices at all. You only use a little bit at a time, unless your making some kind of -ade. So why not fresh squeeze it? Plus, you get to use the zest as well! You can't buy those delicious essential oils in the grocery store. This is also a great addition for cocktails. From images.doba.com
Perforated pot insert:

I don't necessarily use this for pasta, as much as I use it as a steamer. When it comes to steaming veggies like fresh peas or edamame, this is the best option around. This is also great for doing seafood steams/bakes (throw all ingredients in with some white wine, beer, or seasoning and call it a day) because, unlike the other options, this is pretty heavy duty. So, if your like me and when you get clams, your going to cook off like a million, this can handle the load. You could technically use it as a smoker as well, however, then everything used with that insert will taste smokey, which isn't always a bad thing if you ask me!From fbcdn-sphotos-d-a.akamaihd.net
Silpat:

I am brand sensitive with this selection. This product lays down in your sheet tray and completely prevents anything from sticking - dead serious! This thing is amazing all around. Cookies cook evenly; if cheese falls out of your Stromboli, it doesn't stick to the tray; you can make crackers without having them burn; make some cheese crisps; all this and you can put it in the dishwasher as well! I've seen these last for years, even longer if taken care of properly. They can be pricey depending on what you get, and they also have some options that are like muffin trays; and are really awesome to create little bowls to hold product in. One cool thing to do is take fresh masa, grits, or polenta, and line these molds with them, then fill it with some delicious dip so you eat the bowl as you eat the dip. 
Digital scale: 

I suggest this if you are counting calories, baking, or measuring. Remember in science class we learned the difference between volume and weight? Measuring cups measure volume, and shouldn't be a measurement for anything but a liquid. One cup of flour does not weigh anywhere near how much a cup of sugar weighs, Furthermore, the cup measurements tend to be to variable for me. Depending on how fresh an herb may be, or how much you pressed something into the measure means all the difference in creating a consistent dish. You'll notice that most chefs from EU and UK use this method, and Americans are the only ones who don't seem to grasp this idea. Anyway, you can pick these up pretty cheaply at your local general store. Make sure that you can toggle between lbs/oz and kilo/grams to replicate foreign recipes with relative ease. 
Roasting/Chemising rack:

These have many uses in the industry, but derive from the same idea: by elevating the product, you are able to get hot/cold air under the product. For example: cooling cookies, baking bacon so its super crispy, roasting proteins, and pouring chocolate, glaze, or fondant over some baked good. 

Saturday, June 29, 2013

Canned beans vs soaking your own


Ok, let’s talk about beans/legumes of the dried variety! I love vegan/vegetarian food; so beans are a pretty big part of my diet, and I used to be all about canned beans because they were convenient and easy to grab and make something. However, once I began to read labels (which I hope you all do), I realized that this was probably not the best option. Not only are these items exposed to cleaning chemicals, but the “juice” they sit in is full of Calcium Chloride (a preservative), salt, sugar, and other additives for flavor (think along the lines of baked beans). And most recipes call that you should rinse the beans before use anyway…


So, I did a little research into this chemical compound, and I found that it is the salt of Calcium and Chloride and it is pretty prevalent in the manufacturing industry. It’s used as a flavor enhancer, electrolyte agent (this is included in some bottled waters), as well as a preservative. Sounds legit, right?

Well, here’s something to consider: Calcium Chloride was a component of the lethal chemical weapon “Agent Orange” (which was internationally outlawed after the Vietnam War). Is this really safe? It’s FDA approved and what not and the levels are contained within a “safe” parameter. Cool. But who makes this substance?

According to my research, the largest manufacturer of this chemical compound is Dow Chemical Company (over 30% market share). Turns out, this company is a best friend with Monsanto and collaborate to manufacture and design a large quantity of Genetically Modified Organisms. Is this some kind of looped trade that puts the consumer in the middle of their financial jaws? At half of the global consumption rate, North America is the leading buyer of products containing this formula, followed by China and Canada http://www.reuters.com/article/2013/06/14/marketpublishers-idUSnBw145568a+100+BSW20130614  This is a major issue is it not? This is why I choose to soak my own beans and then cook them.

With this as the background, let’s explore the best way to avoid these chemicals. Beans and legumes that are dried tend to expand 150%  so I’ve found that its best to place amount of beans you want (I usually do up the whole bag) in a container and fill with water so that the liquid is twice the volume of the beans. This will probably be about three inches or so.

I would advise to leave the beans soaking overnight, or for at least eight hours. The more they soak, the easier they are to cook. I should also mention that if you are hydrating things, do it in separate containers. A lot of times the color from red or black beans will bleed into the other ones. This results in a mush of color and provides no contrast whatsoever.

After the beans have soaked appropriately, they are ready to be cooked. Strain the remaining liquid from the soaking process. Fill a pot with the beans and enough water to cover the beans by an inch or so of water (you can also use chicken or vegetable stock at this stage for added flavor).
I would plan on cooking them for about  two to four hours depending on the size of your batch. I really like this method as opposed to the canned product because you can really control how much texture you want your product to have. I find that the canned ones are a bit too mushy for my liking.

When I cook the beans, I am able to stop the cooking process when they have reached the desired texture. Play around with cooking times to find the consistency that you like. I prefer them to be soft enough to break apart in your mouth, but firm enough that they won’t turn into hummus after being stirred only a handful of times.

Once the beans are cooked, strain the remaining liquid out and allow the beans to cool. Do not leave the liquid in the pot and continue to cook, or transfer it to another cooking vessel. This will only result in the transfer of the color of the liquid to the next application. So, if you’re cooking black beans and intend on making chili, transferring your cooked beans to another pot with the rest of the ingredients waiting to go will only result in a dark, mucky stew. You are now ready to use chemically free beans in your next adventure!  

Check out these recipes to utilize the beans!