Search This Blog

Showing posts with label cook. Show all posts

Monday, July 8, 2013

12 Kitchen items that will make your dishes extra sexy!


I've come to the realization, as of late, that I go to someones house and they are like "Oh! your'e a chef, you can cook anything!" I usually shrug my shoulders and say "Yeah dude." Then somehow we start cooking or coming up with something, because I love cooking with people and I love sharing information on a personable level. However, I've found the average kitchen to be quite lacking in tools to help you create restaurant (or just better) quality dishes.

So, I've compiled a list of 12 items that we (chef's) have in the kitchen that help us reach the goal we desire. Here they are in no particular order:
Mandolin:

This item is probably one of my favorite things to utilize. As you can see, this model comes with a few attachments that allow you to not only make thin cuts, but also a julienne cut, and a ripple cut - which are way cool! Furthermore, I would like to draw your attention to the black item that is sitting on top of the mandolin. This is a guard/guide and basically spears the product while protecting your hand against the blade. SAFETY is the key here!! I could probably bore you to death with the amount of stories I have of people taking the tips of their fingers off on these guys. USE THE SAFETY MEASURES!

There are cheaper plastic models that offer the same peace of mind. I'm not terribly partial on either model though. The plastic ones last a few years, but the metal ones can last a lot longer. If you are going to get a metal one, get one where you can remove the blade and either sharpen it or replace it. A lot of the metal ones can get dull and therefore create a bigger issue than previously had. 

A knife sharpener:

I'ts very important to keep your blade sharp. You may think a sharp knife is more likely to cut you - that's not true whatsoever. The sharper the knife, the easier it cuts; therefore requiring less effort from you. A lot of times when you have a dull knife, you have to hack away at something in order to cut it and that can be both messy and dangerous. This is an easy way to avoid all those situations. 

Mesh strainer:

I use strainers all the time, and have a few of them. For general use, I would say get a larger one (somewhere in the 9"-12" diameter range). I would say that it is very important that you also have a container that this strainer fits on top of so you can strain properly into it, instead of all over the counter and floor. I wouldn't really suggest that you invest in a fine mesh strainer. I'd say the one in the picture below is a medium, and it works for pretty much everything I need. I strain a lot of stuff out of broths, purees, gravys (get those lumps out!),  and for when I make cheese/whey protein. These items are pretty cheap (I think I picked up a set of three for under $10), and really allow you to take it up a notch!From www.nfsequip.com

Food processor:

This can quickly become your best friend in the whole world! A food processor is different from a blender because, if you notice all the attachments below, you have a ton more options to do with it. This comes in handy when you are breaking down large batches of produce or cheeses. This is also great when you have to mince or fine chop a bunch of ingredients. I've also pulled off making small dough batches, as well as your own mayo (aole if you want to be trendy). The slicing and grating attachment are great as well for blowing through fruits or vegetables to use for pies and the grater is amazing with cheese. 
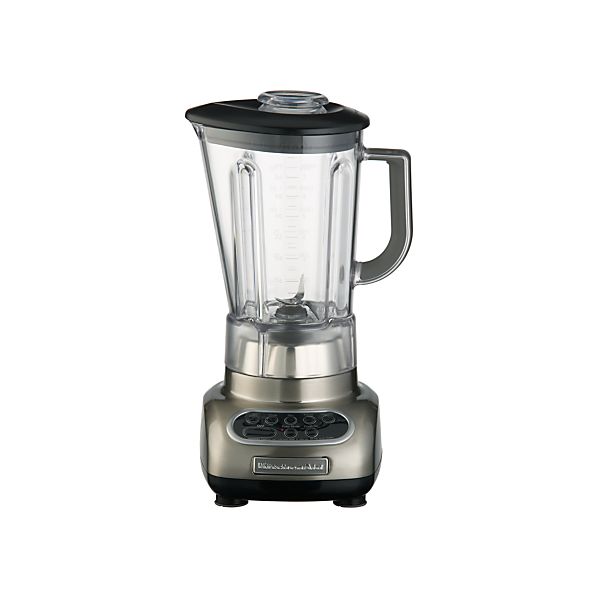
Blender:

I use blenders all the time and I would say its more essential than a food processor. However, you can mostly just blend product, and there aren't any fancy attachments. The more powerful the blender the better! This is a great addition for pureed soups, sauces, smoothies, shakes, even cold oil or vinegar infusions. I prefer this to a stick blender because it usually creates a finer, smoother product than anything else I've worked with. 
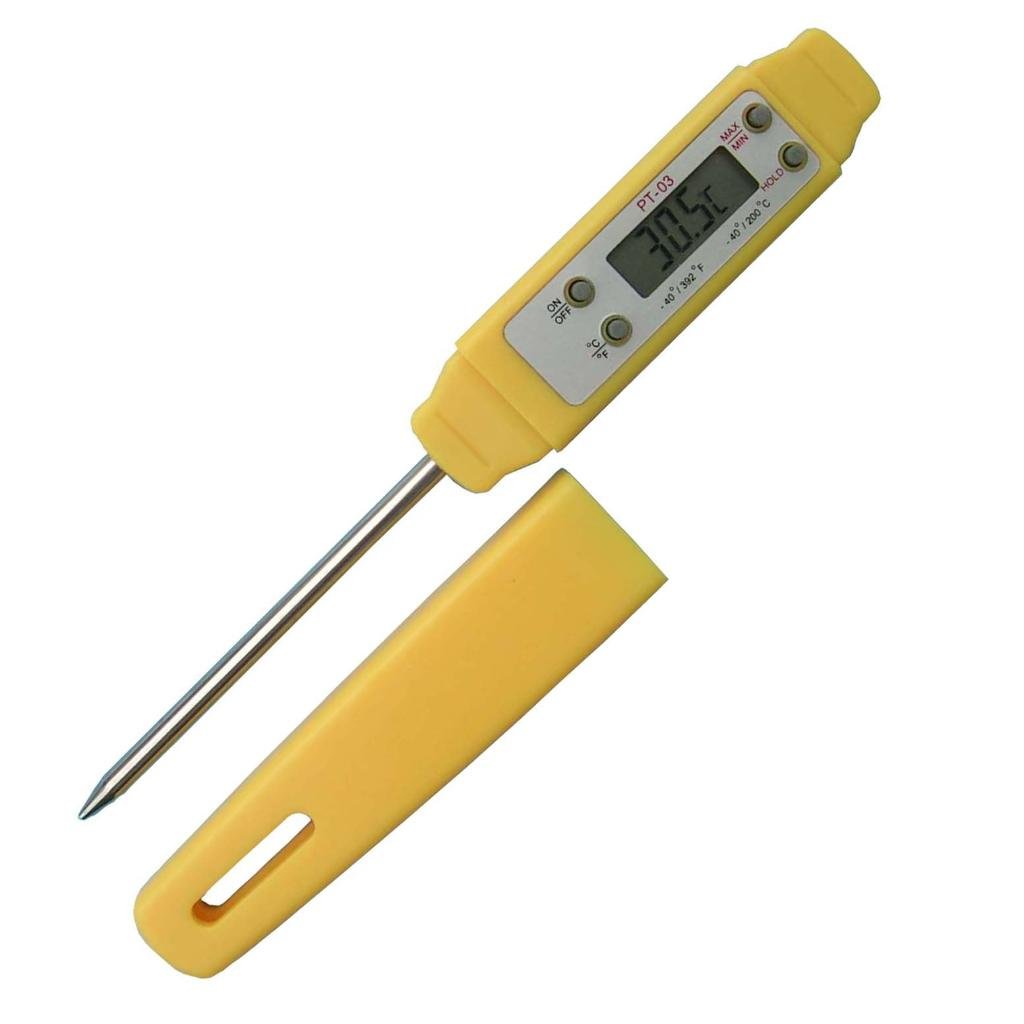
Thermometer:

This is your number one friend in the kitchen! If you choose to get anything from this publication, get this and nothing else! One of the biggest issues I've seen is that people tend to overcook proteins, or their oil is not hot enough (or too hot) when they are frying something. So, I suggest you pick up a thermometer of the digital variety. I only say this because most of the analog thermometers require you to submerge the probe a good inch or so into the product. A digital one only requires that the tip of the probe be exposed to the temperature area thus resulting in a more accurate read. Make sure that your thermometer goes above 350 degrees though. You want to be able to make sure that if you go above it, you know before your oil catches flame. 
Zester/grater:

These little tools are one of my favorite things to use in the kitchen. This allows you to utilize the zest of citrus fruits, as well as creating a fine grate of cheese, nut, or ginger. It's really versatile in the uses, and you can simply throw it in the dishwasher when you need to wash it. I don't think mine ever makes it in the drawer haha. I would recommend the Microplane brand when it comes to this - it's totally worth the price. They have a lot of varieties, but this one and the wider model are the ones I would suggest.  Fresh grated anything tastes a whole lot better than anything you could find in a jar or in the dried version. 
Citrus Juicer:

These usually run around $3-$5 each. I totally suggest getting one of these to really utilize the freshness of citrus juice. I'm not a fan of buying these juices at all. You only use a little bit at a time, unless your making some kind of -ade. So why not fresh squeeze it? Plus, you get to use the zest as well! You can't buy those delicious essential oils in the grocery store. This is also a great addition for cocktails. From images.doba.com
Perforated pot insert:

I don't necessarily use this for pasta, as much as I use it as a steamer. When it comes to steaming veggies like fresh peas or edamame, this is the best option around. This is also great for doing seafood steams/bakes (throw all ingredients in with some white wine, beer, or seasoning and call it a day) because, unlike the other options, this is pretty heavy duty. So, if your like me and when you get clams, your going to cook off like a million, this can handle the load. You could technically use it as a smoker as well, however, then everything used with that insert will taste smokey, which isn't always a bad thing if you ask me!From fbcdn-sphotos-d-a.akamaihd.net
Silpat:

I am brand sensitive with this selection. This product lays down in your sheet tray and completely prevents anything from sticking - dead serious! This thing is amazing all around. Cookies cook evenly; if cheese falls out of your Stromboli, it doesn't stick to the tray; you can make crackers without having them burn; make some cheese crisps; all this and you can put it in the dishwasher as well! I've seen these last for years, even longer if taken care of properly. They can be pricey depending on what you get, and they also have some options that are like muffin trays; and are really awesome to create little bowls to hold product in. One cool thing to do is take fresh masa, grits, or polenta, and line these molds with them, then fill it with some delicious dip so you eat the bowl as you eat the dip. 
Digital scale: 

I suggest this if you are counting calories, baking, or measuring. Remember in science class we learned the difference between volume and weight? Measuring cups measure volume, and shouldn't be a measurement for anything but a liquid. One cup of flour does not weigh anywhere near how much a cup of sugar weighs, Furthermore, the cup measurements tend to be to variable for me. Depending on how fresh an herb may be, or how much you pressed something into the measure means all the difference in creating a consistent dish. You'll notice that most chefs from EU and UK use this method, and Americans are the only ones who don't seem to grasp this idea. Anyway, you can pick these up pretty cheaply at your local general store. Make sure that you can toggle between lbs/oz and kilo/grams to replicate foreign recipes with relative ease. 
Roasting/Chemising rack:

These have many uses in the industry, but derive from the same idea: by elevating the product, you are able to get hot/cold air under the product. For example: cooling cookies, baking bacon so its super crispy, roasting proteins, and pouring chocolate, glaze, or fondant over some baked good. 

Saturday, June 29, 2013

Canned beans vs soaking your own


Ok, let’s talk about beans/legumes of the dried variety! I love vegan/vegetarian food; so beans are a pretty big part of my diet, and I used to be all about canned beans because they were convenient and easy to grab and make something. However, once I began to read labels (which I hope you all do), I realized that this was probably not the best option. Not only are these items exposed to cleaning chemicals, but the “juice” they sit in is full of Calcium Chloride (a preservative), salt, sugar, and other additives for flavor (think along the lines of baked beans). And most recipes call that you should rinse the beans before use anyway…


So, I did a little research into this chemical compound, and I found that it is the salt of Calcium and Chloride and it is pretty prevalent in the manufacturing industry. It’s used as a flavor enhancer, electrolyte agent (this is included in some bottled waters), as well as a preservative. Sounds legit, right?

Well, here’s something to consider: Calcium Chloride was a component of the lethal chemical weapon “Agent Orange” (which was internationally outlawed after the Vietnam War). Is this really safe? It’s FDA approved and what not and the levels are contained within a “safe” parameter. Cool. But who makes this substance?

According to my research, the largest manufacturer of this chemical compound is Dow Chemical Company (over 30% market share). Turns out, this company is a best friend with Monsanto and collaborate to manufacture and design a large quantity of Genetically Modified Organisms. Is this some kind of looped trade that puts the consumer in the middle of their financial jaws? At half of the global consumption rate, North America is the leading buyer of products containing this formula, followed by China and Canada http://www.reuters.com/article/2013/06/14/marketpublishers-idUSnBw145568a+100+BSW20130614  This is a major issue is it not? This is why I choose to soak my own beans and then cook them.

With this as the background, let’s explore the best way to avoid these chemicals. Beans and legumes that are dried tend to expand 150%  so I’ve found that its best to place amount of beans you want (I usually do up the whole bag) in a container and fill with water so that the liquid is twice the volume of the beans. This will probably be about three inches or so.

I would advise to leave the beans soaking overnight, or for at least eight hours. The more they soak, the easier they are to cook. I should also mention that if you are hydrating things, do it in separate containers. A lot of times the color from red or black beans will bleed into the other ones. This results in a mush of color and provides no contrast whatsoever.

After the beans have soaked appropriately, they are ready to be cooked. Strain the remaining liquid from the soaking process. Fill a pot with the beans and enough water to cover the beans by an inch or so of water (you can also use chicken or vegetable stock at this stage for added flavor).
I would plan on cooking them for about  two to four hours depending on the size of your batch. I really like this method as opposed to the canned product because you can really control how much texture you want your product to have. I find that the canned ones are a bit too mushy for my liking.

When I cook the beans, I am able to stop the cooking process when they have reached the desired texture. Play around with cooking times to find the consistency that you like. I prefer them to be soft enough to break apart in your mouth, but firm enough that they won’t turn into hummus after being stirred only a handful of times.

Once the beans are cooked, strain the remaining liquid out and allow the beans to cool. Do not leave the liquid in the pot and continue to cook, or transfer it to another cooking vessel. This will only result in the transfer of the color of the liquid to the next application. So, if you’re cooking black beans and intend on making chili, transferring your cooked beans to another pot with the rest of the ingredients waiting to go will only result in a dark, mucky stew. You are now ready to use chemically free beans in your next adventure!  

Check out these recipes to utilize the beans!

Monday, June 17, 2013

How-to dice an onion

In a continuation of my "How-To Summer Series," I would like to proudly present a proper way to dice an onion. I would like to continue to stress how influential consistent and well executed cuts can make a difference in how your dish turns out. 

This explanation will also expose you many safety issues surrounding dicing an onion. I would really like to stress this since not earlier this week a new person was dicing an onion for the first time at work, and cut themselves pretty bad. I don't want you to cut the tip of your finger off or slice your skin through to the bone and have to rush to the ER room. So, please go slowly with this and practice, practice, practice. Safety is the key here!

Step 1:

Gather: a sharp knife, an onion (or how ever many you need to do), and a cutting board. 


Step 2:

Slice the longer end (not the hairy end) all the way through, creating a flat surface. 


Step 3:

Place flat side of onion down on the board. Cut down the middle of the "hairy" end as shown below.


Step 4: 

Remove the skin from each half of the onion completely.


Step 5: 

Rotate the onion so that the flat end is parallel to your body position as depicted below. Then, place your palm on the top of the onion. Make an incision at the bottom of the onion and work your way up.  You control the size of the dice by this first step. You can do a lot of cuts, and have a small dice; or have less cuts and create larger dices for soups and whatnot. Keep in mind as well that you should not go all the way through the onion. Keep a 1/4" distance from the end of the onion so that it stays intact while you are cutting it. Go all the way through and you will have your onion laying in slices all over the place.

It is important that you keep your fingers straight at this point of the procedure. Keeping your ligaments parallel to the knife prevents them from bending and being exposed to the blade, resulting in you loosing the tip of a  digit or two. So, keep your thumb up, and your fingers straight to avoid this!


Step 6:

A small dice on a medium sized onion should look something like this before progressing to the next step. 


Step 7: 

Start slicing perpendicular to your previous cuts, but from the top of the onion like so. Please note that I am not going all the way to the end, and I am leaving room so that the slices stay intact to the onion. 


Step 8: 

It is important to notice here how I am guiding the knife with my fingers. My middle finger guides the blade while being tucked in to avoid contact with the tips of my finger. My pointer finger and ring finger press down to hold the item in place. My thumb and pinkie are pinching the side and tucked in so that I can allow my middle finger to move freely and guide the blade. 

In an effort to make cuts consistent, the distance of this cut should be the same distance as the previous cuts.  


Step 9:

Return to the original starting position and cut perpendicular to the previous cut. Starting at the top and moving from the cut end towards the "hairy" end cut all the way through the onion. Keep your fingers behind your middle finger to ensure safety. 


Step 10: 

Here is a POV shot of going half way through the onion. Note that the distance of these cuts should be the same as the previous two to ensure a square cuts and to keep it sexy. 

Store in a sealed container in the fridge for later use; or use immediately. 


Thursday, June 6, 2013

How-to: Julienne Red Onion


I’m not sure if I’ve put this up on social media or on here, but I think cuts can make or break you. Consistent and precise cuts can take a dish up one or two levels easily. However, without a basic knowledge of how to execute these procedures, it may be hard to take a dish I put up on here and get it to look like it does in the picture. I know a lot of people see something that looks good and want to make it exactly like it is portrayed. So, I’m going to be doing a weekly how-to series on some basic procedures that will help you blow everyone’s socks off. No matter what you’re serving, nice simple consistent cuts make it look so much more polished and confident.

First up is how to julienne a red onion. The tricky thing with onions is that they are cylindrical. When you’re trying to get straight cuts from a circle, it can be quite precarious to say the least. Keep in mind that this cut can be applied to any onion shaped produce. I just chose to do a red onion because they’re great to have pre-sliced to dress up any dish with a little pop of color and flavor.

If you have any questions or comments please feel free to leave them on the blog or put them on the Facebook page. 

Step 1:
Gather your SHARP knife and a red onion. Place on cutting board. 


Step 2: 
Cut ends off of red onion as depicted in the picture below. You are just looking to trim the ends off, not cut most of the onion apart. The goal is to create a consistent edge.


Step 3: 
Place onion on a cut side and slice down the middle.


Step 4:
Remove outer skin layer. Try not to take the top layer of flesh off. All you need to do is remove the dry layers from the onion.


Step 5:
Rotate the cut part of the onion so that it is facing you. Start slicing the onion from one side to the other.


Step 6:
You want to start off with a tilt in your knife. A 45 degree angle should do the trick. Since the object is round, proceed to cut radially as shown in the picture. This way all the slices will be as consistent as possible. 

Remember to guide your knife with your middle finger while having the tips of your fingers tucked in so you don't cut yourself. I've done that way too many times and it sucks. 


Step 7:
Continue to go through the onion until you have about a quarter left. Rotate the onion so that the rounded end faces you like in Step 5. This will allow you to finish your cut.


I hope this helps! If you have anything you would like me to do in my series, please let me know! 

Thursday, May 9, 2013

Local cuisine: enhancing your experience


I want to enhance the eating experience – plain and simple. It is my one true goal to enable you to fully enjoy your meals the way nature originally intended. It’s through the information and education that I am able to provide that I hope to enable my readers to take the next step in the right direction so that they may take hold of their lives through what you eat.  I sincerely hope that what I have provided so far has been helpful and informative in your decision making. You hear it all the time:you are what you eat; and it’s true. You can only output what you input.

If more of us valued food and cheer and song above hoarded gold, it would be a merrier world.” ― J.R.R. Tolkein

First, allow me to share a story with you. Early in my culinary career (it’s been seven or eight years now), I was working in an upscale diner-esque atmosphere in Atlantic City, New Jersey. A little background: when you start off in the culinary field, you usually start off being a prep person then move up to pantry/cold station where you are in charge of salads and desserts. This is where I found myself at this particular moment in time.

It was a usual summer day of hectic prepping and getting ready for the throngs of tourists for the Atlantic City Air Show. The time was late July, or early August; I can’t remember specifically. One of the dishes I had to mise en place was a “fruit salsa” that went on a cake. One of the ingredients in this dish was blueberries. In my prepping travels, I found myself (as anyone working in the industry will tell you) standing perplexed in the walk-in fridge, wondering: “Why did I come in here?!” As I slowly recovered from my “walk-in syndrome,” my gaze fell upon a container of blueberries. “Ah-ha!” I exclaimed; and reached for the box. However, once I grabbed the item and looked at it, I realized something – these blueberries were from California. Now, I’m not sure if you know this, but Hammonton, NJ is the blueberry capital of THE WORLD and is located approximately 40 minutes by car from Atlantic City... The. Blueberry. Capital. Of. The. WORLD!

How can it be cost effective for a food distributor to ship blueberries across the country when the “best” blueberries in the world are less than 100 miles away?

It was at this pivotal moment in my life that I started to ask questions and gather information regarding the issue of local sourcing.

Food is our problem. Food is our solution” – Ron Finley

If you’ve ever created a dish or grown an edible plant such as an herb and cooked with it, you understand that there is a bond created between you and the experience that can be very rewarding and instantaneously gratifying. You know when you put your heart and soul into that creation; the result is a direct projection of your dedication. Now, the time has come to take it to the next level.

Locally sourced product allows you to enjoy the fruits of your land - your personal land that you call home. Now, I’m not saying you need to start being a gardener or farmer and raise your own produce and protein (but you should). I’m merely stating the fact that it takes less money to transport the product, there are fewer middlemen (thus making it cheaper), and here’s the best part: you personally support small business and your local community. On a microeconomic scale, if we keep the money in one location, it tends to reverberate.  Go to the source.
If you’ve ever traveled, you came into contact with foreign substances to which your body had no prior exposure. You may have noticed having a reaction to these elements.Be it a runny nose, headache, or cold-like symptoms, your body reacts to foreign substances. Now take a moment to pause; and think.

Where did your food come from?

If you travel to another location and suffer some kind of side effect or possible illness/death (think of infiltrated/untreated water systems) by simply exposing your being to that intrusive and strange substance, what else could it possibly doing to the inside of your body - what are the long-term effects?

Does the constant collision of international pathogens with your immune system wear away at your body so much so that it’s almost like WWIII inside your being?

I’m not a scientist by any measure; but, I am still doing a lot of research into this with the hopes of finding an answer. It’s something to think about.

My experiences that I’ve had with local cuisine have been nothing more definitive than game changing.
When you drink wine, you are supposed to inhale first to prepare your palate to taste it properly. This allows to you enjoy the wine to the fullest… blah, blah, blah. But here’s the thing: the air you breathe, the water you drink, and the pollution that surrounds you are elements of your environment. You dwell in it; it dwells in you. When any pollutant or chemical hazard is exposed to your area, it is exposed to you. It is your interactive world.

Here comes the good part. If your body doesn’t have to focus on defending itself against foreign elements, the brain allows more ease of taste. When I cook local product, I find that I use less salt than with imported items. Why? Because all those pathogens have already been exposed and are contained in you; you get to taste food for the way it was meant to be. Not frozen or in a can; and certainly a burger made out of thousands of cows from all over the world! This stuff is as fresh as you can possibly get. Processed foods tend to be full of salt, sugar, and fat’s to make them taste like what we are expecting. News flash! Local and fresh product tastes better. It’s as simple as that. Take for example: have you ever grown your own tomatoes? Are they not the best tomatoes ever? They’re local; that’s why.  

If you want to experience this phenomenon known as local cuisine ,there are many things you can do:
  1. Join a CSA (Community Supported Agriculture): These tend to be local farmers who have a size of land portioned off for financial contributors. You pay a flat rate at the beginning of the season and each week you get to go to the farm and either receive a box/basket worth of produce or pick out what you want from a selection.
  2. Eat at local restaurants that source locally: I would suggest contacting your state’s agriculture department. They often list sustainable businesses and farmers on their website, and have a variety of useful information specific to each region.
  3. Purchase locally grown food from your supermarket: Most supermarkets will supply local (or at least within the state) produce and meat when it’s in season. However, you are not going to notice a huge price difference until the supply is greater than the demand. Keep an eye out for these items.

We are able to take control over what we eat. We do not have to be subjected to corporate influence over our dietary choices. We are all one community that depends on each other for survival. Help us help ourselves and create a sustainable world that we can enjoy and grow in, not a world created for us by financially driven corporations.